Good evening, Housemates!
I’ve been quite occupied with fun Halloween craft projects the last couple weeks- one of which I wanted to share with you guys here!
So, the wheels have been turning for the party as I shared in one of my last posts. I decided that this year, it’d be fantastic if I made my own trophies for the costume contest. Now, i’ve done gift baskets before, small plastic trophies, gift bags, etc etc. This year I wanted to try something different.
I always worry that once someone gets their costume contest prize home, it ends up trashed or lost amongst a box of random junk. Yes.. insert sad, sad whimpers here.
This year, I thought I’d make it more interesting. What better way to celebrate your costume prowess than with a “plaque” that you can hang on your wall all year round?!
I came up with the idea to use canvas and certain items to create three-dimensional award plaques! Not only was this super easy to execute, but I think it will be immensely effective once completed and presented.
I know that if it were me, this shit would be up on display all year round!
 Now, mind that these are still being completed. The basic concept is what we’re talking about right now, and how you want to proceed beyond this starting point is up to you and your lovely imagination! 🙂
Also don’t limit yourself to making plaques for a party- you could definitely just make these for some flair in your favorite room of the house!
You don’t need much to start…

- Glue gun or other industrial strength glue (this glue gun has Gorilla Glue cartridges- real deal, man!)
- Craft Paint- colors of your choosing!
- Brushes- duh.
- White canvas- I went with a medium sized canvas but you could go bigger or smaller depending on what prop you’re mounting.
- Plaque shaped apliques – this is optional and I ended up holding on using mine until I finish everything.
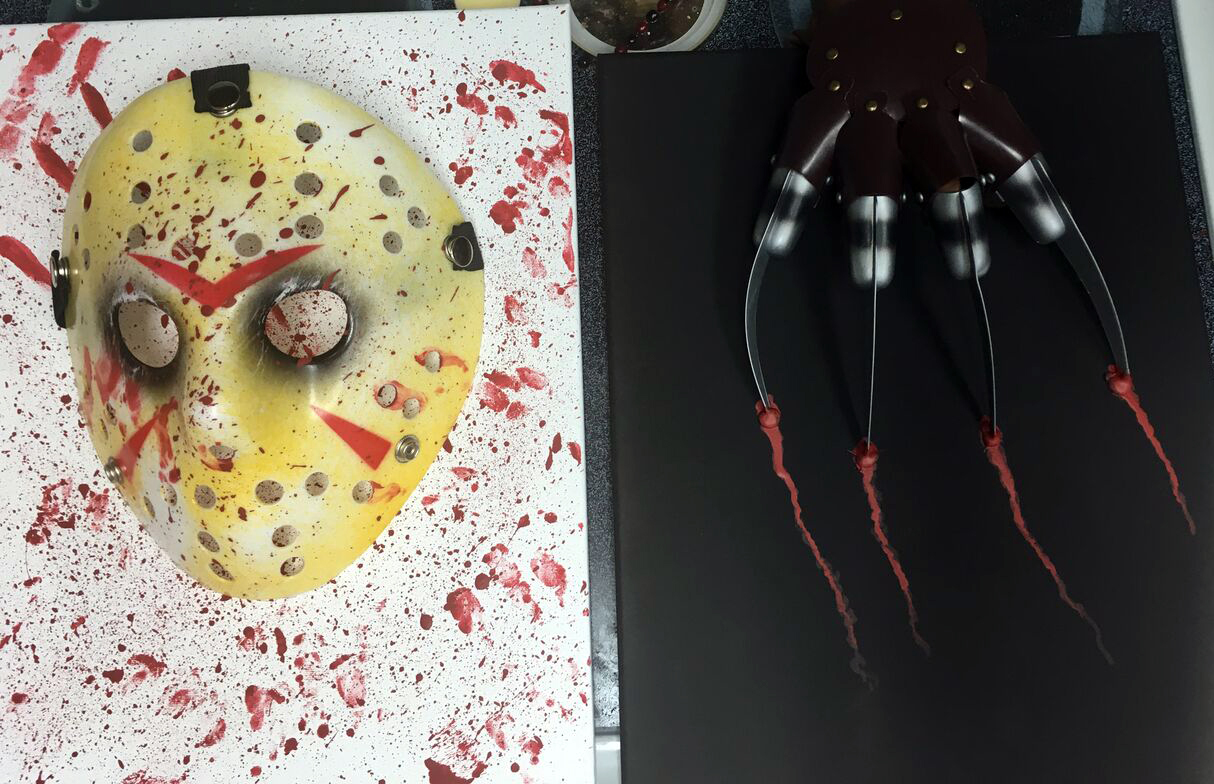
- Statement prop – Pick a prop any prop! In this case I used several masks, a rubber knife, and the Freddy glove.
Start with some paint…
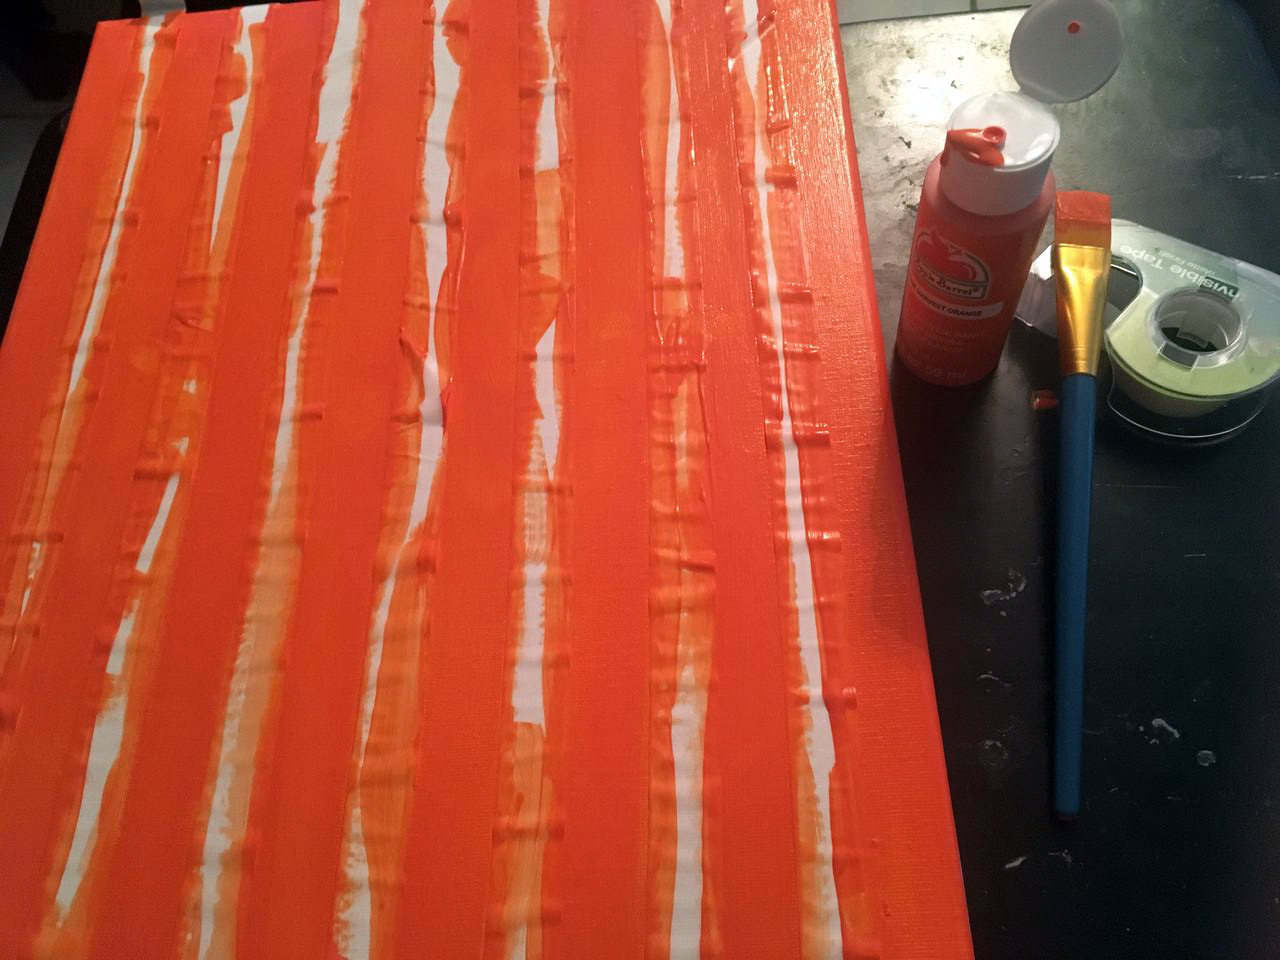 Paint up your canvas with a few layers of the color of your choice. The Michael Myers one is going to be black and orange vertical stripes. I worked on three different canvases at once to try to get as much finished in one night. 😀
Place your prop!
 This particular canvas I wanted to mount a Freddy glove. I initially wanted it to have the hand dead center with the fingers slightly fanned, however, I’d have to stuff the shit out of the glove and try to place it just right. Not gonna happen. So I vouched for making it look as if the hand was raking over the canvas.

I angled the glove over the edge and staged the fingers to see if it would look effective if I started gluing things down. The biggest issue was adding dimension to the fabric part of the glove as it looked so very stupid laying flat.
I used the carton for which the glove came in and cut a strip of cardboard off the top. I then curled it and sized it to the wrist of the glove, gluing the cardboard together, and slipping it in place. I then let the glove open folded the bottom edge over the edge of the canvas, adjusting the length so that there was so slack at eye level. Once that piece was glued to the lip of the canvas, I pinched together the excess and sides and pulled them back over the lip as well to glue the glove shut. Once together, I adjusted the cardboard accordingly.
It was a lot but hey, it was well worth the few minutes it took to get everything just right!

From there I propped up the fingers and staged them in a way that worked for me. You can certainly bend and spread these puppies any which way you like!
Taking a glue gun, I carefully glued the tip of each blade down.
Now in most glue projects, all that excess lumpage surrounding the tips of the blades would look totally fucked up. In this case, you can use all the glue you want and make it work to your advantage.
Paint some details…
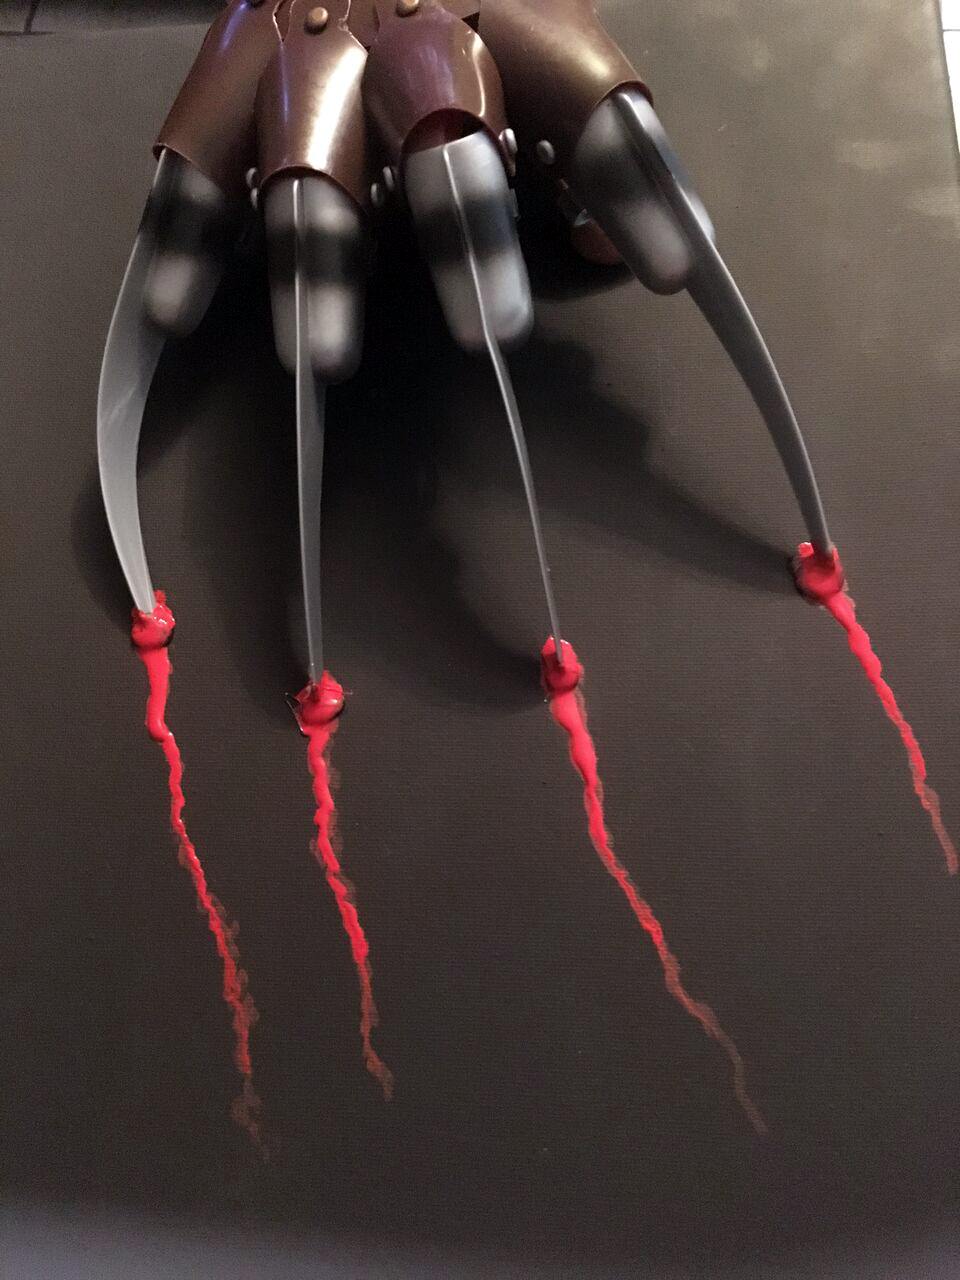
The best comes after you finish gluing all the shit down. I used a bit of red paint to make it look like this glove had raked across the canvas and was creeping back up over the edge. This is where your glue job comes in handy. The more blobby dimension you add the more it will look as though your blades are embedded in the canvas like flesh. Blend out your edges with a toothpick or brush before allowing to dry.
Once finished, hit this with as much gore as you’d like! I used a darker red and a bright red to add a little bit of dimension. You can also put some paint down and drag some sloppy hot glue over it, pulling a toothpick through after wards to create a really fun 3D effect. Follow that with some more red paint and you, my dear, have quite the masterpiece on your hands!
Finishing touches…
I found small paper placeholder shaped tags at Michael’s and used them to create the award plaques at the bottom of each focal object. Voila! You’re done and your party guests have a trophy they can proudly hang in their house all year long!

So, tell me: Is this a project you’re going to do for your party or for your favorite room in the house?? What titles would you crown with these plaques at your party?? Sound off in the comments.
Until next time!
-Sarah